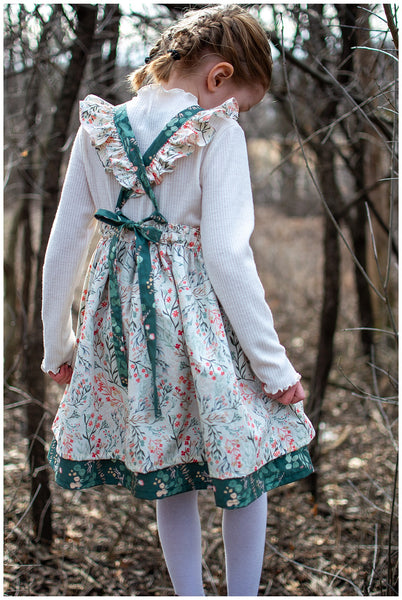
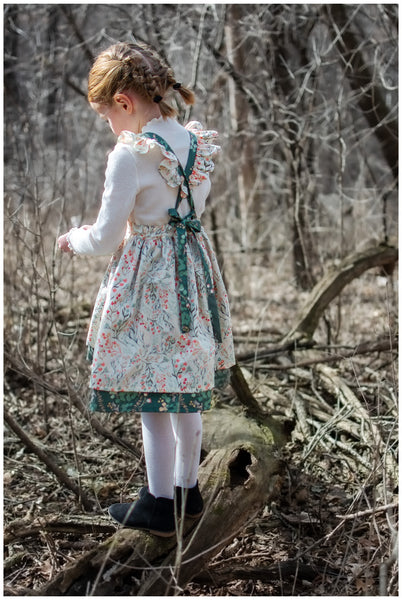
Hello sewing friends! It’s Tamar from Tamar HOPE Designs back on the blog with another sewing 101 post for you! Last month we learned about mastering seam allowances. Check it out here if you missed it! Mastering Seam allowances is so very important for creating beautiful garments! A second skill that is equally important to master (especially for girl’s clothing) is gathering. I’m here today to give you all the tips and tricks for beautiful, even gathers on all of your dresses, skirts, and ruffles! I’ll be using Willow to teach this skill. I love a good pinafore pattern, and Willow has it all - the layered skirt, the gorgeous ruffles, the tied back. It’s just sweetness personified! AND you can get it for 20% off from now until March 26th with promo code GatheringFabric20.
The first step for making beautiful ruffles is sewing two straight and even rows of basting stitches. (Basting stitches are the longest stitch that your machine has. Mine is 4.) I used to think that it didn’t matter if my basting stitches were straight because you couldn’t see them anyway. I learned along the way that straight basting stitches do indeed matter! If your basting stitches are not straight, getting an even gather is going to be much more difficult. When sewing your basting stitches also be sure that the fabric feeds evenly and smoothly. Don’t pull the fabric at all! Your fabric will be difficult to gather if the stitches are uneven.
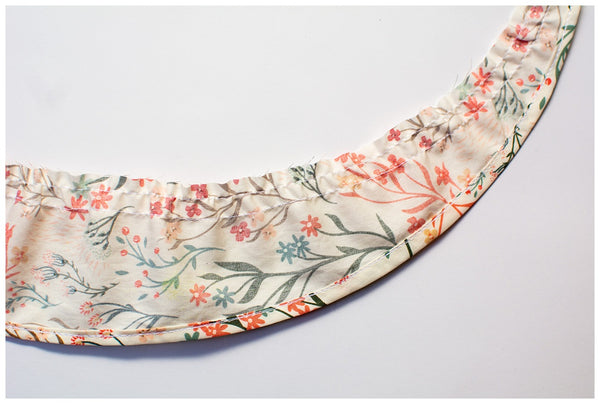
Make sure to always always sew two rows of basting stitches. I used to skip this step. I thought one row of basting stitches was good enough. However, I’ve learned from experience, and I’m here to tell you today, “Always sew two rows of basting stitches!!!” Even if the pattern tells you to sew one row. Just always sew two! You will thank me later. I like to sew one row at ¼ inch and one row at ½ inch. If you are worried about a basting stitch leaving holes in your fabric (if using a very fine or slippery fabric), then sew two rows within the seam allowance. Aim for one row at ¼ inch and one row at ⅛ inch.
Once you have your two rows of basting stitches sewn, find the bobbin threads and slowly begin to pull them both together. (The bobbin threads will be the threads from the underside of the basting stitches).
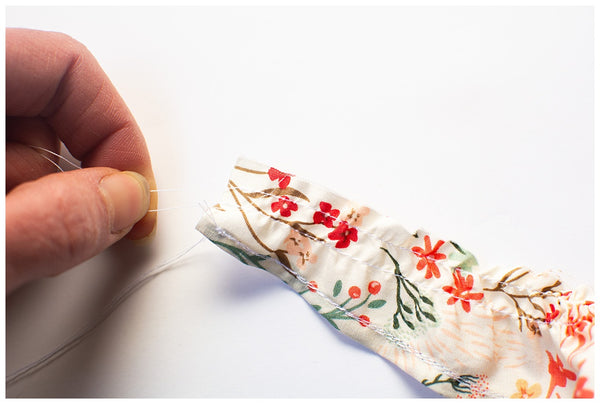
Be careful not to pull too hard or to pull the threads too far from the fabric. You really really don’t want your basting threads to break, because then you have to start all over. Also, don’t buy cheap thread when you are making something that requires gathering. There is nothing more frustrating than spending a good 30 minutes working on getting beautiful gathers only to have your gathering thread break on you! You don’t have to get the most expensive thread out there. But don’t get the cheapest thread either. I like Guterman. I’ve never had an issue when gathering with Guterman thread.
I’ll show you more specifically how to gather slowly and carefully to avoid breakage. First pull the bobbin threads while holding the fabric with the opposite hand. Always keep your hands close together.
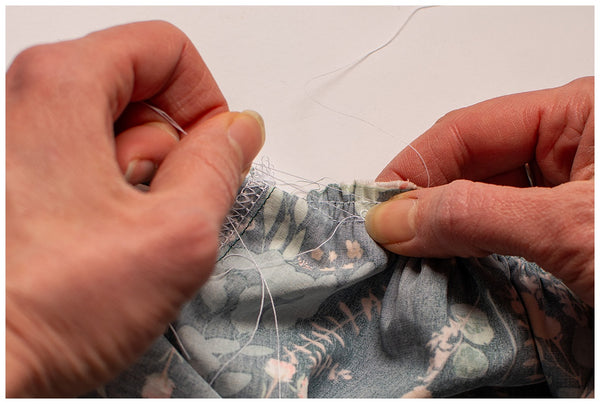
Next hold the fabric with one hand and slowly slide the gathers down the row of basting threads. When you get to a seam, it might be challenging to slide the gathers over the seam. Just keep slowly working those gathers across the seam. Once you get them across the seam the first time, they get easier and easier to move across the seam.
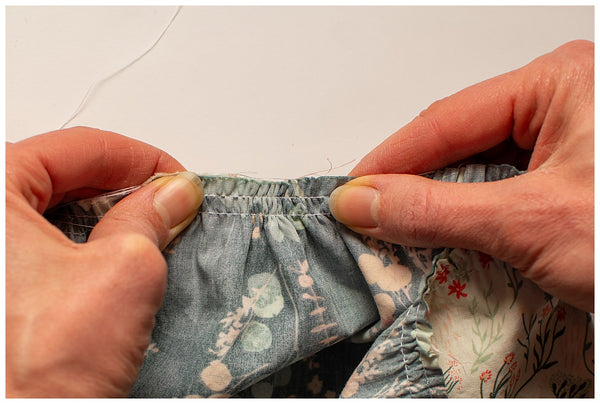
Keep gathering until you get to your desired length. Once your piece is gathered enough, you can move the gathers around until they are nice and even all the way across the gathered piece. This is what even gathers should look like.
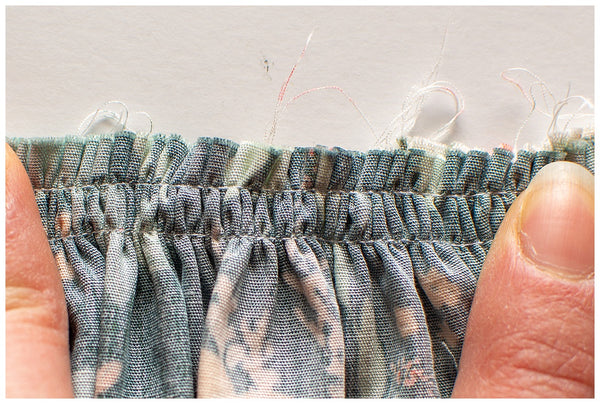
If your gathers look like the following picture, they will not be even. Some areas of the skirt or ruffle will be gathered more than other areas.
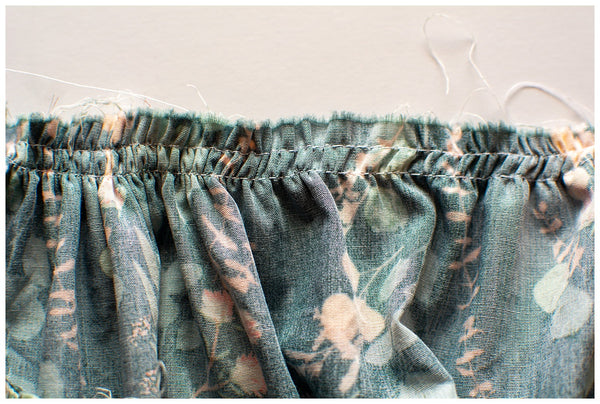
Sometimes one of the rows of gathering stitches ends up getting gathered more than the other row. This will also cause uneven gathers.
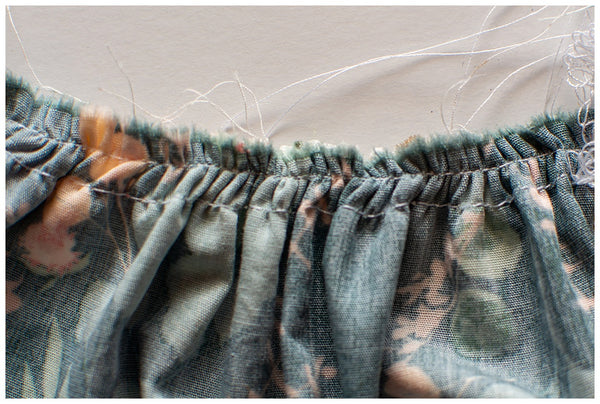
If this is the case, pull the bobbin thread that is looser until the gathers go straight up and down perpendicular to the edge of the fabric.
The more even your gathers are before sewing them, the nicer your finished product will look.
After you sew your ruffle or skirt to the body of the garment and finish any raw edges, you will need to take out the row of basting stitches that can be seen. This is not as hard as it may seem. You do not need to pick out each individual stitch. Find the side that has the bobbin threads (the threads that you pulled to gather the fabric). From this side the basting stitches slip out rather easily. Simply pick a few stitches until you have a tail that can be grasped.
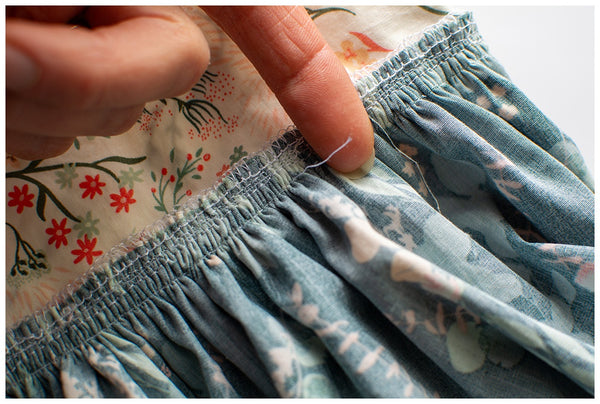
Cut a stitch 2-3 inches down from the tail
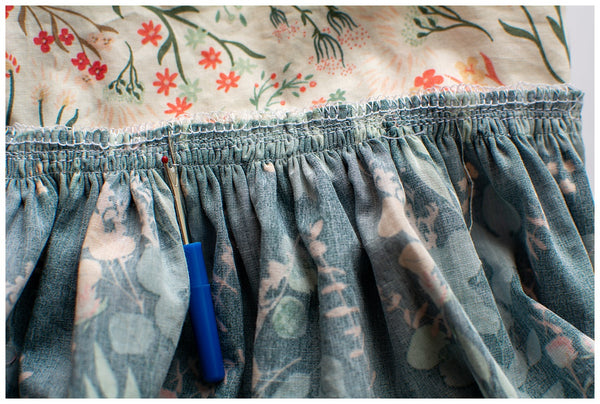
And now just wiggle the thread, and pull it out.
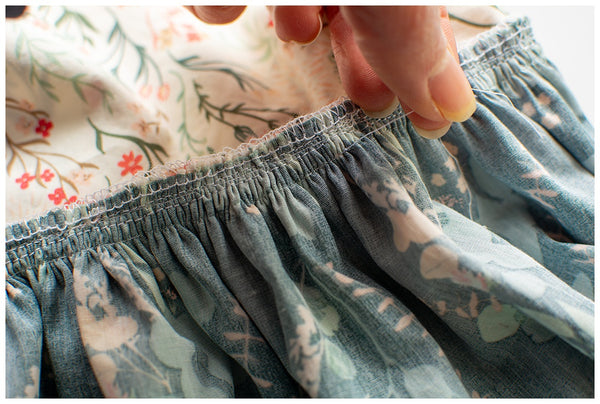
Repeat until the basting stitch is completely out. (If you are sewing with slippery fabric, you can actually take 10-12 inches out at a time.)
A well-gathered skirt or ruffle takes time and patience. You have to be ok with spending more time than you think you should on one little step. But the extra time put into getting it right will be so worth it in the end. You will have a lovely piece that will truly bring you joy each time you wear it or see your little one wearing it!
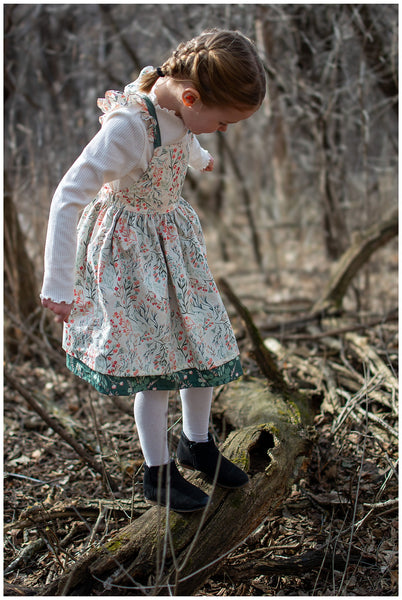
If you are looking for lovely fabric, Art Gallery fabrics is a perfect go to for all those ruffles and gathers. It has just enough structure for all the lovely details in woven dresses, but it’s just smooth enough to allow for easy gathering and easy removal of basting stitches. I love sewing with it, and my kids love wearing it. They never complain about it being itchy like some fabrics.
For this Willow, I used Hillside Meadow Wind; and Blooms and Stems from the All is Well collection. I really love this collection! You will see more of it next month! As well as sharing a new sewing 101 topic, I’ll share a little bit about sewing coordinating outfits with an Art Gallery Fabrics collection!!!
Go forth and practice gathering all those beautiful ruffles! I’ll see you here next month!

2 comments
You make it look beautiful. I think I think I go too fast.
Great lesson on gathering! Every step that you mentioned is so important to do carefully – the proof is in the finished garment!