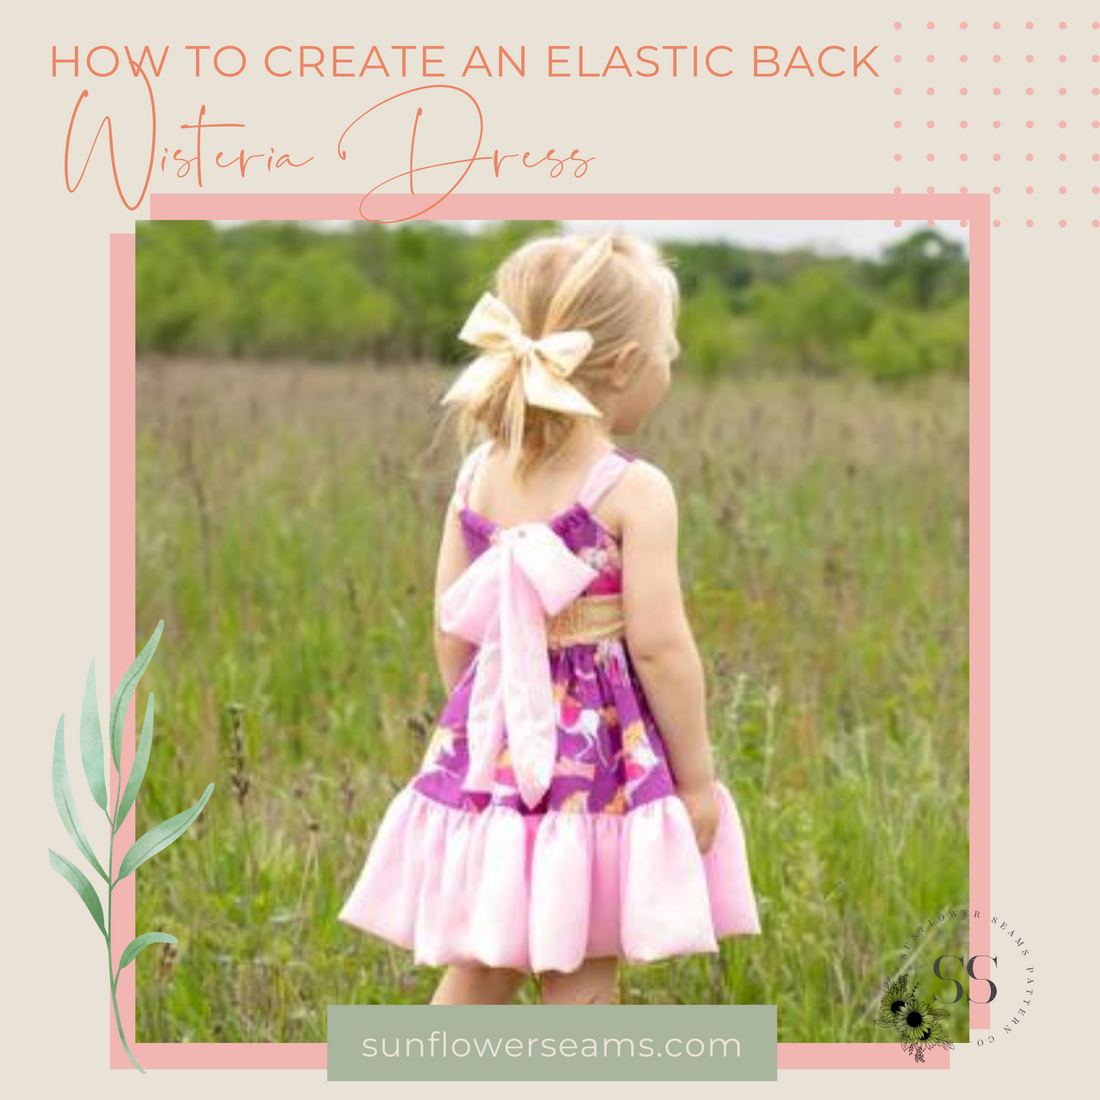


Hi sewing friends, my name is Kaitlin! Do you either have a fast growing little one to keep up with or HATE sewing buttonholes? If so, I have the perfect hack for you! I just fell in love with the dreamy shoulder ties of Wisteria and thought…. this back opening is perfect for an elastic back closure. Elastic back closures allow for a flexible fit and extend the length of time your little one can wear the garment. Today I am going to show you how to create an elastic back Wisteria dress.

Extra materials list: 3/8” elastic and wash away hem tape (optional but VERY HELPFUL!)
| 18m | 2t | 3t | 4 | 5 | 6 | 7 | 8 | 10 | 12 | 14 | |
| Back Waistband Width: Cut 1 main & 1 lining | 15.25” | 16” | 17” | 17.25” | 18” | 18.75” | 19.25” | 20” | 20.5” | 21.25” | 22.25” |
| 3/8" Elastic: Cut 2 | 5.5” | 5.75” | 6.25” | 6.25” | 6.5” | 6.75” | 7” | 7.25” | 7.25” | 7.5” | 8” |

Cut all the pieces as the tutorial instructs except the back waistband piece. Use the cut chart provided to cut the width of back waistband pieces, 1 main and 1 lining. Lay or project the front pattern piece on top of the back waistband piece to cut the correct length.

Exercise/stretch your elastic a few times and then cut 2 elastic pieces using the measurement from the chart.
With a removable fabric marking pen, pencil, or marker, draw a vertical line ¼” away from each end on both elastic pieces.
Next, follow the Wisteria tutorial as written though step 12. Stop when you get to the section titled sewing the waistband. Follow these steps to construct the elastic back closure.

Lay the waistband piece on top of the waistband front with right sides together. Align the side edges, pin and stitch. This will create a continuous loop. Repeat this step for the lining. Press all seams open.

Working on the WRONG side of the waistband lining piece, turn up the bottom raw edge 3/8” and press.


Find the center point on the bottom raw edge of both the bodice main and waistband main. Place the waistband on top of the bodice main with right sides together and match the center point markings. Pin the entire bodice main to the waistband and sew a basting stitch.


Find the center point on the waistband lining. Working on the LINING SIDE of the bodice main, place the right side of the waistband lining to the right side of the bodice lining. This time you will pin the entire waistband piece together and use a regular straight stitch to sew along the raw edge of the of the upper waistband. Trim the seam allowance, turn right side out and press.


With a removable fabric marking pen, pencil, or marker, draw a vertical line straight down from the point where the back piece ends to the bottom of the waist band.

With a removable fabric marking pen, pencil, or marker, draw a horizontal line 5/8” down from the top of the back waistband starting at the first vertical line you made in step 5 to the second one. Draw one more horizontal line 5/8” down from the line you just made. This will create casings for the elastic to go into. Sew a straight stitch along the horizontal lines backstitching at the beginning and the end.
Follow the steps in the Wisteria tutorial for creating the romper or skirt of your choice *WITHOUT MAKING A PLACKET*


Sew two rows of gathering stitches, 1/4'” and 5/8” from the raw edge of your skirt or romper.


Making sure the waistband lining is folded out of the way, place the bodice into the skirt/romper right sides together. Match the side seams, gather the skirt to match the width of the bodice and pin the top raw edge of the skirt to the bottom raw edge of your bodice waistband main ONLY. Tip: On the back skirt I like to keep it more gathered from the side seam to where the casing starts and less gathered where the casing is located. This is because once the elastic is placed in it will naturally gather more. Stitch.


Apply the wash away hem tape on the folded under edge of the back waistband lining between the two vertical markings. Fold the skirt/romper/bodice seam allowance up and secure the back waistband lining with the hem tape to that seam. From the main side topstitch 1/8” from the seam to secure the back waistband lining to that seam between the two vertical markings. This will create the last elastic casing.


Using a bodkin or safety pin, pull the elastic through the first casing. Line up the line you made on the elastic with the vertical line on the back waistband. Sew, making sure to backstitch at the beginning and end, on the vertical line on the waistband to secure the elastic. Pull the elastic through to the other side and repeat to secure.


The middle casing will be left open. Repeat step 11 with the bottom elastic casing. Apply the wash away hem tape on the folded edge of the waistband lining that has not be sewn.


Fold the skirt/romper/bodice seam allowance up and secure the waistband lining with the hem tape to that seam. From the main side topstitch 1/8” from the seam to secure the waistband lining to that seam.
Go back to the Wisteria tutorial and complete steps 17 and 18.

Now your little one can wear their beautiful garments even longer and you don’t have to fuss over buttonholes!


