Hello Sewing Friends! Tamar here from Tamar Hope Designs, on the blog for the next serger series post! We have been learning so many fun skills on our sergers this year. We have covered the basics, blind hems, gathering, and rolled hems. Today I’m going to be talking about flatlock stitching using your serger. The flatlock stitch is a fun one. It’s often found on athletic wear and shows up as a decorative stitch on the outside of the garment.

It took me years to try this stitch, because I assumed that it would be hard. Once I finally gave it a try, I was surprised to find out that it’s super easy and gives a fun unique finish. It also allows you to use your serger to hem which is a great bonus! I used the flatlock stitch to sew everything but the zipper on this Plumeria, and I will show you how!

Set up your machine
The first step is to set up your machine for a flatlock stitch. Decide if you want a wide stitch or a narrow stitch. I used the wide stitch. For a wide stitch, remove the right needle. For a narrow stitch, remove the left needle.
Now, you just need to adjust the tensions and you’re ready to go. I would recommend digging out your manual to get the settings that work best for your machine. My machine works best with the following tensions. Needle 1, upperlooper 4.5, lowerlooper 7.5.

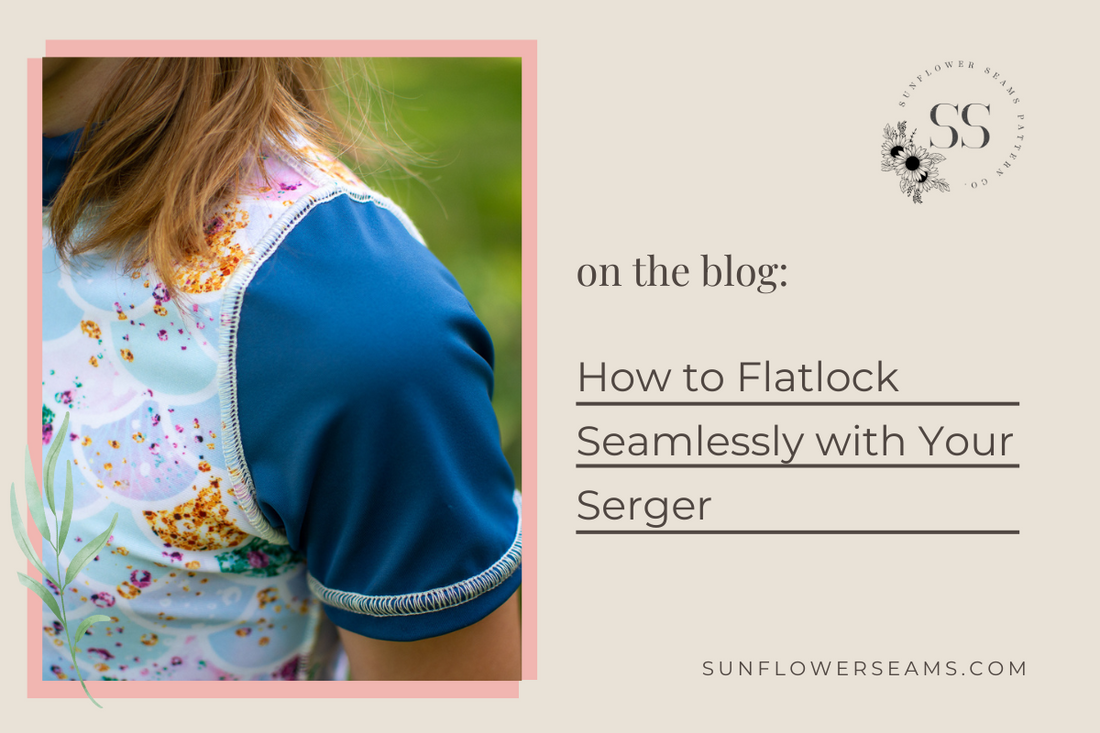
Sewing
For flatlock stitching you need to sew with wrong sides together since you want the stitching to be visible on the right side of the garment.

Your stitches should appear on the right side along the edge.

The backside should look like this when you take it off the machine.

To get the stitch to lay flat, you simply need to stretch the seam apart to reveal the ladder stitches.

When stretched apart, the right side of the seam is joined by a lovely decorative flatlock stitch.

It takes a little bit of thinking to figure out how to stitch all the parts of the garment together with flatlock stitches. Just remember that you always sew with wrong sides together, and sew with the main fabric on top.
For the neckband, that means you clip the neckband on the inside of the garment wrong sides together.

Sew with the main fabric on top.

For the sleeves, you will clip the sleeves inside the garment, wrong sides together.

Again, sew on the main fabric

For the hem, turn the hem up and secure it using glue or hem tape.

Turn the hem up one more time and sew along the folded edge making sure to catch the raw edge in the stitches

Your hem stitch will be along the bottom fold of the garment.

When you pull the stitches apart, your hem will lay flat.

That’s all there is to it! It’s really quite easy once you wrap your mind around how to make sure you are sewing with wrong sides together. Give it a try! It’s kind of addicting!

Happy Flatlocking!
-Tamar