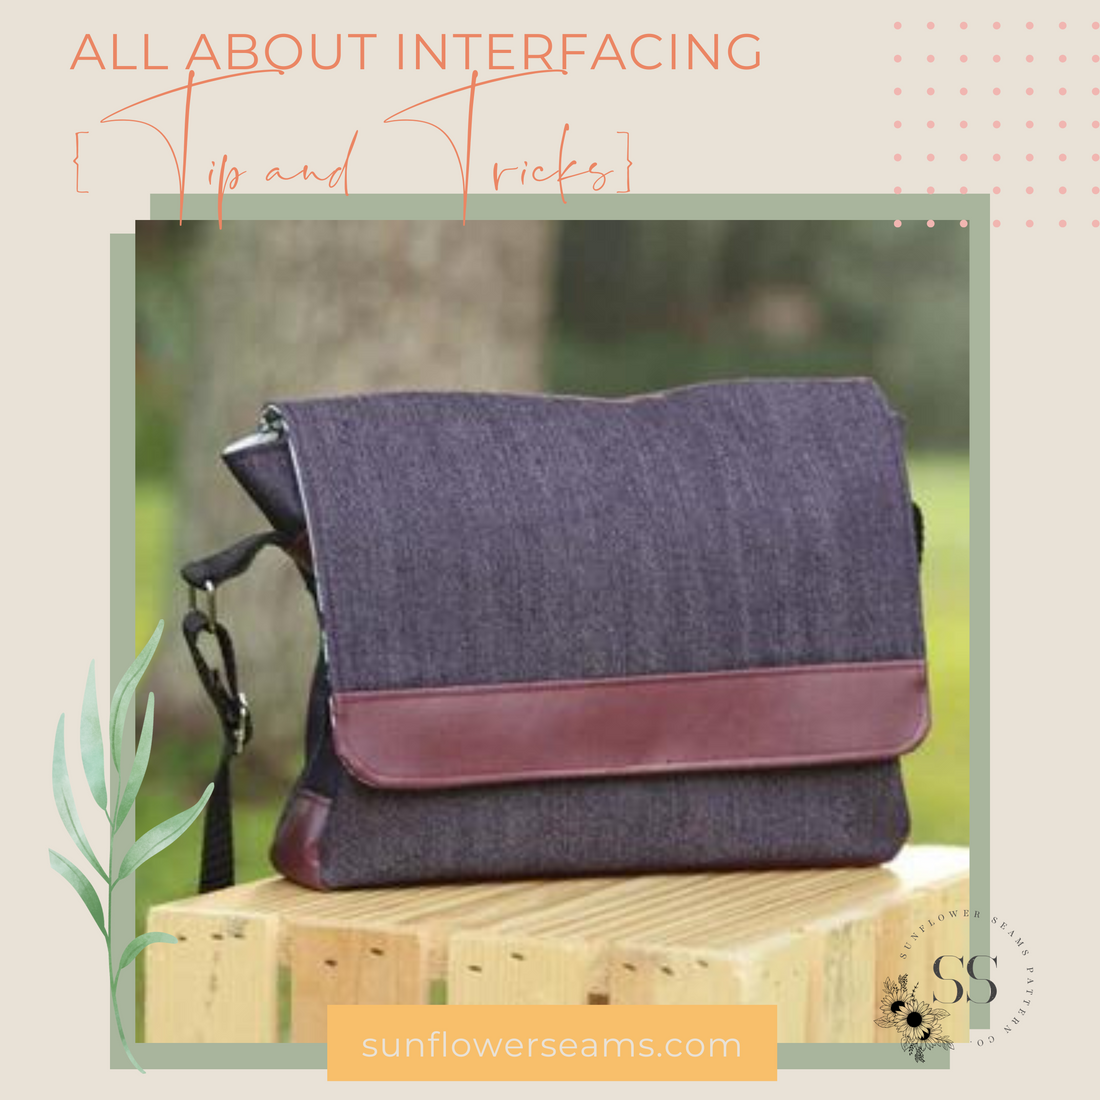


Hello all! I'm Sam and I'm here on the blog today to talk about interfacing! Have you seen the new Sage pattern? I was lucky enough to be a tester for the Sage bag, so I've already made several (and have another cut and yet another in planning stages). The first time through I made it with NO interfacing. I used a stretch denim for the outer with vinyl accent on the flap and vinyl strap holders, then I used a quilting cotton for the lining fabric. The stretch denim offered a little bit of structure so I skipped interfacing all together.


I made my final version with different fabrics for my little but I interfaced it and the structure was much better.


I fell in love with this bag the minute the tester call was posted and I knew I was going to make myself an everyday purse with it which is why my first version was all black everything. I love a good floppy bag and had intended to keep that first one for myself but it wasn't going to hold up for what I need it to (probably two years of everyday carry), so I made another. Not to worry though, it wasn't a waste, my mom has claimed it for herself.


This time I used the same fabrics, but I interfaced. I used Pellon 931TD fusible midweight interfacing for the outer fabric pieces and Pellon PLFB36 ultra lightweight fusible interfacing for the lining pieces.

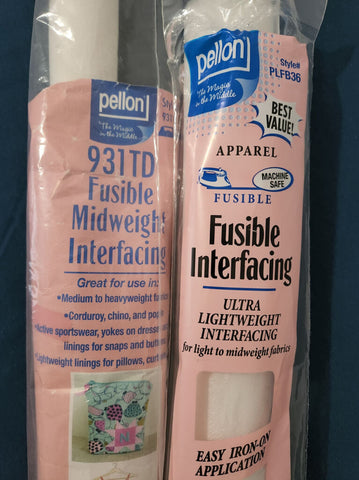
Basically if it was stretch denim, it got midweight and quilting cotton got lightweight. I did not interface the vinyl bottom, I could've definitely used a fusible fleece but I didn't.


I also used little squares of buckram to reinforce the magnetic snaps on all the bags - which I highly recommend. I used two roughly (I didn't measure) one inch squares for each of the snap pieces so it is double thickness, one is square with the bag and the other is at a 45 to it, so like a square with a diamond shape on top. I feel like this really helps keep the pressure off the fabric when you pull the magnetic closure apart. Function was a pretty high priority for this bag so I wanted to make sure the snap would hold up to LOTS of use.


As you can see here the interfaced bag holds its shape pretty well when hung up, where the non-interfaced bag just kind of hangs. Both bags do somewhat support themselves sitting up but the interfaced bag definitely retains shape better.


This is what the inside of the two bags look like! They do both somewhat stand on their own because of the thicker denim, but of course the non-interfaced bag does have a bit of droopiness to it. I did add some features to the second bag besides interfacing, including a zip pocket and card slots which were interfaced as well and helped add some structure as well.
And now you know what the same bag can look like with a little interfacing! Of course interfacing comes in TONS of different weights so you can absolutely customize this bag to have as much or as little structure as you'd like. You could even use a combination of fusible foam and fleece to make a laptop/tech bag! I can't wait to see what you make with this fantastic pattern, please share your sews with us over in the Facebook group so we can all ooh and aah over it! <3